



Problem statement
Nowadays, to provide more convenience for users and to eliminate the need to create multiple accounts and remember each one to access different systems, web applications have created many useful features for account creation, such as allowing users to log in using Google, Facebook, or GitHub accounts, etc. This not only saves users time in creating new accounts but also eliminates the need to remember them every time they want to log into the system.
Furthermore, integrating social networks into the website login system offers several benefits, such as: collecting additional user information like date of birth, place of residence, gender, etc. – information that is often omitted during the account registration process. Combining this with social media-based commenting systems is also very convenient.
Laravel Socialite integrates Google authentication into websites.
- Application description
First, I will press the Google login button to log in to my account.

Next, I will choose a Google account to log in to my website.
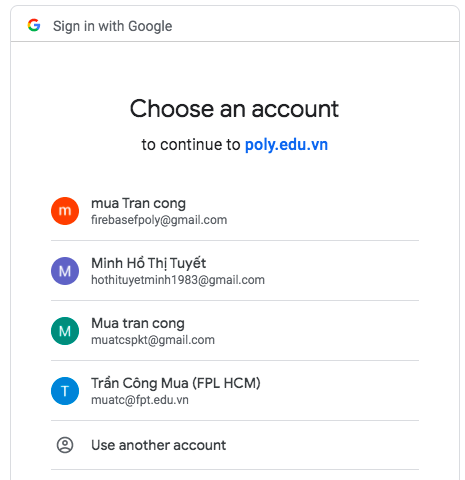
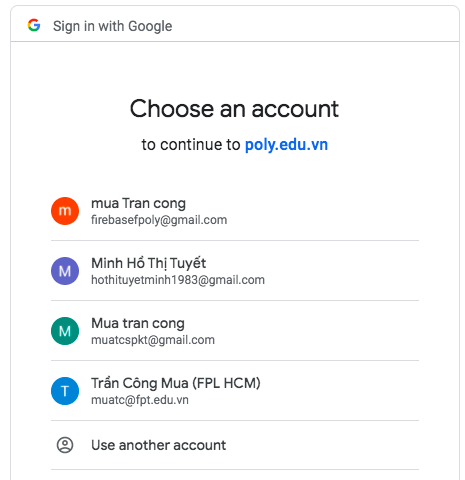
After logging in, the website will redirect to the homepage and display your username in the menu bar.

- Perform
Here are the steps to log in with your Google API account:
B1: Create a Laravel project in CMD using the command line:
+ composer create-project laravel/laravel login-google

+ cd login-google : To navigate to the login-google folder
+ php artisan serve: To run the server
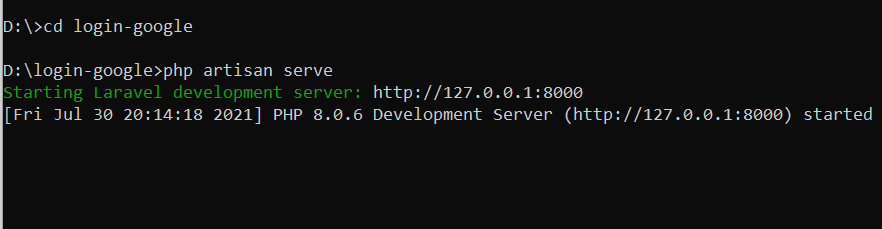
The final result will look like this.

B2: Adjust the user migration settings and run `php artisan migrate` to create the users table.
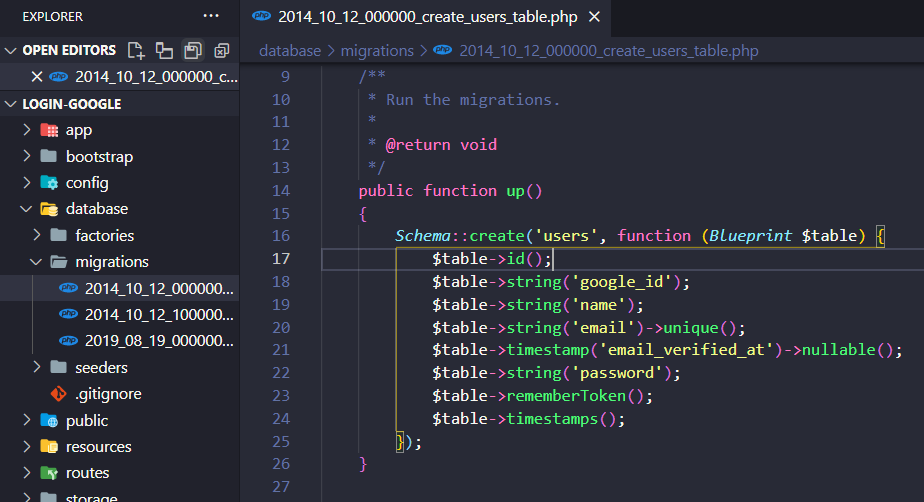
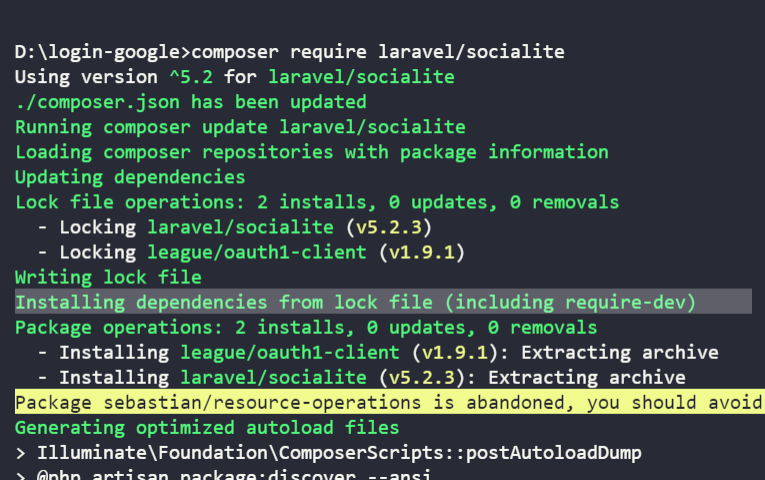
B3: Install the Socialite package to connect to your Google account using the command line.
composer require laravel/socialite
+ Configure settings for Laravel Socialite
In the config/auth.php file, add the Socialite code.

Now, go to the config/services.php file and set the parameters as shown below.
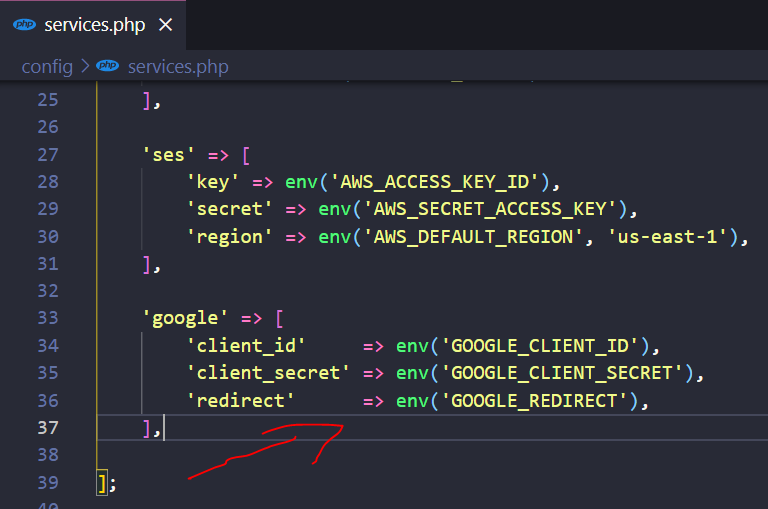
+ In the .env file, we declare the values for the client_id, client_secret, and redirect parameters through the following steps:
You enter https://console.cloud.google.com, After logging in, select CREATE IDENTIFIERS and choose OAuth client ID.
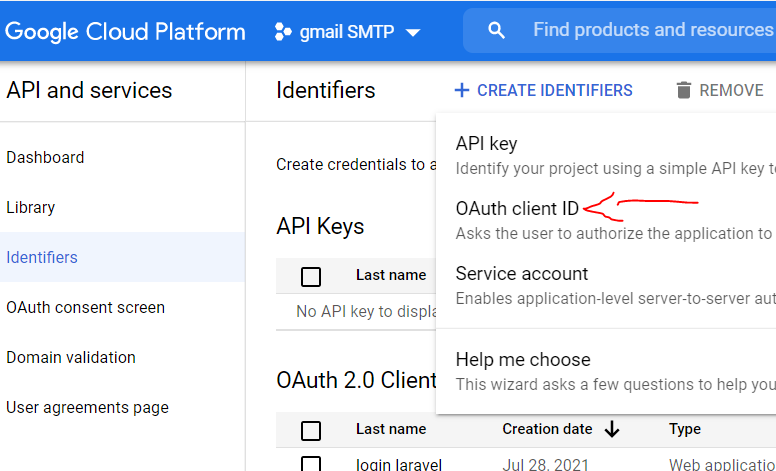
Next, under "Type of application," select "Web application" and name your API.

In the Allowed redirect URIs section, add the path containing your domain name.
/google/callback looks like the image

When you select "create," it will return these two fields to us.

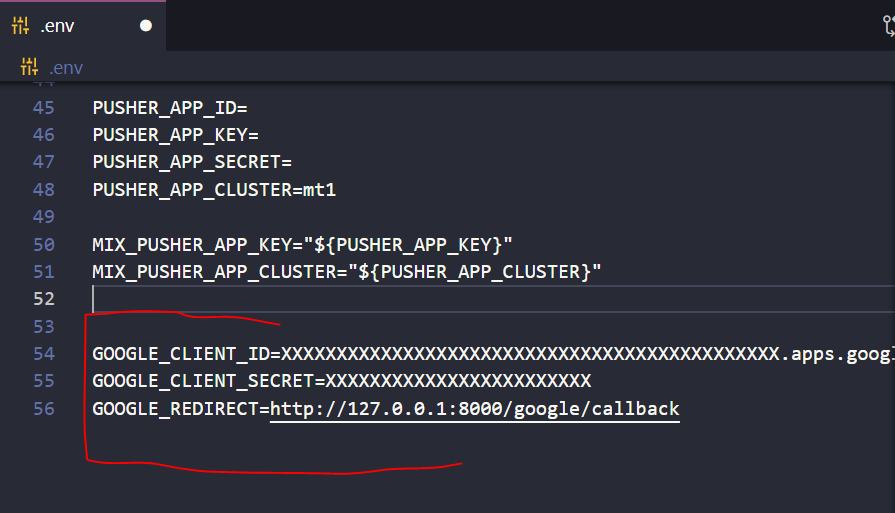
Finally, in the .env file, create three variables as shown in the image, then copy the two fields above and the "Allowed redirect URIs" field into them. That completes the configuration for the .env file.
B4: Create Auth Login using command lines
+ Composer requires Laravel/UI
+ php artisan ui bootstrap
+ php artisan ui bootstrap –auth
+ npm install && npm run dev
B5: At controller app/Http/Controllers/Auth/LoginController.php We process two functions.
redirectToProvider: Redirects users to an OAuth Provider.
handleProviderCallback: Retrieves information from the Provider, checks if the user already exists in the database, logs them in if necessary; otherwise, adds the new user to the database.
<?php
Namespace App\Http\Controllers\Auth;
paper App\Http\Controllers\Controller;
paper App\Providers\RouteServiceProvider;
paper Illuminate\Foundation\Auth\AuthenticatesUsers;
paper Socialite;
paper App\Models\User;
class LoginController extends Officer
paper AuthenticatesUsers;
/**
* Where to redirect users after login.
*
* @var string
*/
protected $redirectTo = RouteServiceProvider::HOME;
/**
* Create a new controller instance.
*
* @return Void
*/
public function index()
{
return view('frontend.form.login');
}
public function redirectToProvider($driver)
{
return Socialite::driver($driver)->redirect();
}
public function handleProviderCallback($driver)
{
try {
$user = Socialite::driver($driver)->user();
} catch (Exception $e) {
return redirect()->route('login');
}
$existingUser = User::where('email', $user->getEmail())->first();
if ($existingUser) {
auth()->login($existingUser, true);
else {
$newUser = new User;
$newUser->google_id = $user->id;
$newUser->name = $user->name;
$newUser->password = $user->token;
$newUser->email = $user->email;
$newUser->email_verified_at = now();
$newUser->save();
auth()->login($newUser, true);
}
return redirect('/');
}
}
+ B6: In routes/web.php, reset the routes and add routes like this:
Route::get('/', [App\Http\Controllers\HomeController::class, 'index'])->name('home');
Route::get('login', [App\Http\Controllers\Auth\LoginController::class, 'index'])->name('login');
//login google
Route::get('redirect/{driver}', [App\Http\Controllers\Auth\LoginController::class, 'redirectToProvider'])
->name('login.provider');
Route::get('{driver}/callback', [App\Http\Controllers\Auth\LoginController::class, 'handleProviderCallback']);
+ B7: To create a login interface, we create a link in the following format.
<button type=”button” class=”btn btn-light”>
<a href=”{{ route('login.provider', 'google') }}‘>Login to Google</a>
So, with a website built using the Laravel framework, you can now log in with Google! ☺ .
Author: Thy Dao Quoc - Date written: March 22, 2023
Category: Training program, IT - Website Design, IT - Software Applications, Information Technology - Software Applications, TECHNOLOGY AND ENGINEERING SECTOR

0 thoughts on “Laravel Socialite tích hợp xác thực Google vào website”